Clipping Path Office

  • HOME
  • ABOUT US
  • OUR SERVICES
    • Clipping Path Service
    • Image Masking Service
    • Photo Retouching Service
    • Photo Manipulation Service
    • Shadow Adding Service
    • Web-Shop Image Editing Service
  • PRICING
  • PORTFOLIO
  • CONTACT US
  • BLOG
FREETRIAL
  • Home
  • Blog
  • DIY Photography
  • Three Lighting Setups for Reflective Objects
January 20, 2021

BLOG & Gossip

Three Lighting Setups for Reflective Objects

by Geetika Bhasin / Monday, 02 July 2018 / Published in DIY Photography, DIY Product Photography, E-commerce Product Image Tips, E-Commerce Product Photography

Glass, gems, and metals are the products that are counted into the category of highly reflective. These three types of product throw the challenge to the photographer to shoot them in proper and good manner and this is the reason we are going to discuss them one by one

Metal objects

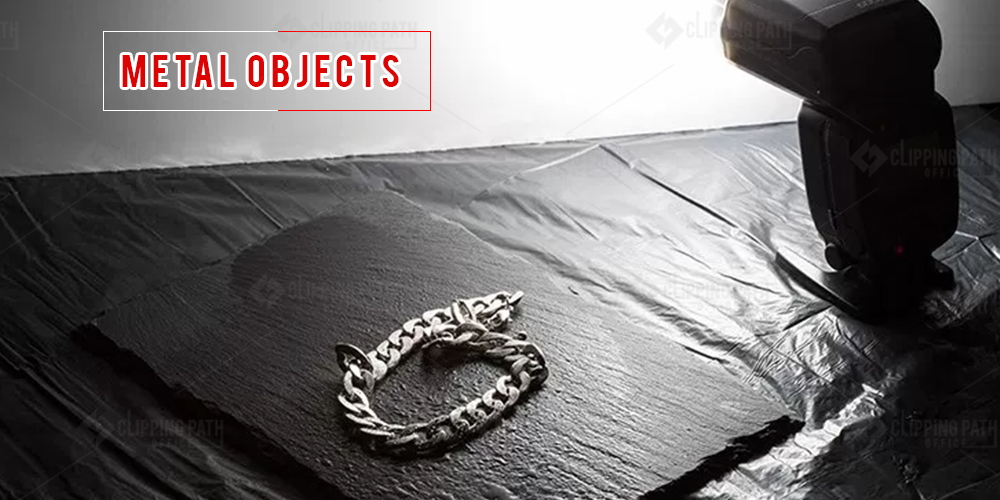
At very first number let’s just talk about the metal objects which are considered as the most difficult in product photographer because of the reason that they are highly-reflective in nature. The detailed procedure is mentioned below:

Set-up

The first step to shoot metal objects is arranging the set-up for which you have to place your object on the table or block and have to place large studio lights on each side of the product. The other requirement is umbrellas which will diffuse lights on the both sides. You also need a sheet of the paper that is able to reflect the light on the subject. Because you are using two diffused lights that’s why you did not need the foam board. The next job is camera positioning on the tripod. You can prefer to use strobe lighting for having more control over the light. You have to decide that the lighting must be in the above the product which will angle down to shoot the product. Before you proceed further remember to wipe all the stains from the product to have best pictures.

Camera setting

The next step calls for setting of the camera. You need the best match of settings for the camera to achieve the photos that are best in quality. You have to set the aperture at f/11 or greater and keep ISO low that can be 100 ad last is shutter speed which must be according to the light meter settings. Make sure you set the camera focus in centre. For your convenience you can set the white balance at auto if you don’t want to set it manually.

Post-processing

The last step of every type of the photo-shoot is post processing to give the product the desired form and look.  You have to post process the images to remove all the flaws from them by using various tools of the Photoshop that can be the cloning tool which is capable to remove all the dust, fingerprints and smudges and also remove other type of imperfections. You also have to concentrate on the background and the colour contrast, all are equally important to give the best looks to the product.

Glass products

Other big responsibility of the photographer is to shoot the glass products which is consider very complex for shoot and to get the clean and clear images

The steps to shoot the glass products are

Arrangement of the set-up

The primary step for shooting every kind of the product is set-up. You need to arrange the set-up for shooting the glass products. For having the perfect set-up you will need a table which will be helpful in setting the product and one large light and umbrella which is used to diffuse the light. It must be placed on the left side of the products for better results. After this you will need a white paper, the end which will be connected to the bottom of the camera lens. Remove all the foreground reflections from the product. The next thing that you require is the foam board which you place on the opposite side of the light source. You also can tape the two pieces to make it inverted V that will surely help to give soft and even light on the product.

Camera setting

The next step that follows the set-up is the setting of the camera. According to the backlighting set-up you will adjust the camera settings. For instance you will set the white balance according to the type of the lighting that you are using like the daylight, tungsten, and fluorescent etc. You also have to set the focus on the centre of the product and set the aperture to f/11 if you want to get the sharpest images. The shutter speed will follow the light meter’s recommendations. If you are facing the problem in the settings then you can set your camera to aperture priority mode and with this your camera will take the responsibility of optimizing the shutter speed. Set your ISO at low point.

Post- processing

The most awaited step to give the desired look to the product is post processing as it allows the user to make the desired changes in the images and make them free from all the imperfections. It will remove all the smudges and spots from the products and also consider the colour of the product with the perfect background. You can make experiments with the images by using various tools and using shadows to make them appealing and desirable.

Clear or colored glass

The third type of the product which is considered highly reflective is glass or clear glass products which are photographed by using the simple and effective technique that is backlighting. It will surely give your glass products the crystal clear look. The step to shoot the glass products are:

Set-up

The glass products require the backlighting set-up for which you need ample area as you are dealing with the fragile products and you have to use the safety proven methods for this. Use the sturdy table to stand the product by considering the light source. You have to place the light source behind the product to make the brightest area shine and it also helps you to highlight the natural outer lines and curves of the product. If you are using the tripod then you have the choice of strobe or continuous lighting. And you also need the umbrella to diffuse the light and a foam board to reflect light on the product. The next requirement is to use the white paper that is placed between the light and the object.

Camera setting

Set the aperture to f11 or f/16 according to the details of the product you need and set the ISO at 100. Users of continuous light will choose the shutter speed according to the light meter’s reading. You have to choose the manual mode of the camera to have the best results.

Post-processing

Do the necessary adjustments in the glass images as mentioned in the above two types of the product.

That’s all about the shooting of the reflective products. Follow these steps to have the best results.


  • Tweet
  • Share 0
  • Reddit
  • +1
  • Pocket
  • LinkedIn 0
Geetika Bhasin

Hi, This is Geetika Bhasin. I am a professional content writer with years of experience in researching, improvising and supplying content to my far-fetched clientele. I am fond of writing articles and stories and when I am not doing so, I will be reading or driving.

Related

Tagged under: DIY Lighting Setups for Shooting Reflective Products, Photographing Highly-Reflective Products: How to Control Reflections, product photography lighting setup reflective objects, Techniques for Photographing Reflective Objects, Three Lighting Set-Ups for Reflective Objects

About Geetika Bhasin

Hi, This is Geetika Bhasin. I am a professional content writer with years of experience in researching, improvising and supplying content to my far-fetched clientele. I am fond of writing articles and stories and when I am not doing so, I will be reading or driving.

What you can read next

Selling More with Professional Product Photos
Some Effective Tips For Furniture Photography With Smartphone
Optimizing Images for Omni-channel Selling

Leave a Reply Cancel reply

Your email address will not be published. Required fields are marked *

Search

SUBSCRIBERS

  • 0comments
  • 190posts
  • 0users
  • 0likes
  • 0followers
  • 0followers
  • 3followers
  • 4410followers
  • 1followers
  • 0followers
  • 0followers
  • 0subscribers

Categories

  • Architecture Designs
  • Background Remove
  • Camera Settings
  • camera shots
  • Clipping Path/Cut Out Image
  • Color Correction
  • Cosmetic Product Photography
  • Customer’s Point of view
  • Digital World
  • DIY Photography
  • DIY Product Photography
  • E-commerce Product Image Tips
  • E-Commerce Product Photography
  • Edit With Photoshop
  • Fashion Image Editing
  • Freelance Photographer
  • Furniture Photography
  • Ghost Mannequin Photography
  • Growing Business by Onilne
  • Hair Masking Services
  • Image Editing Services
  • Image Manipulation
  • Image Manipulation Service
  • Image masking services
  • Image Optimization
  • Images Editing for Real Estate
  • Images Optimized
  • Improve Post Editing
  • Infographics
  • Infography
  • Neck Joint
  • Non classifié(e)
  • Photo Editing Software
  • Photographer Tips
  • Photography Tips
  • Photoshop Expart
  • Photoshop Tools
  • Portrait Image Editing
  • Product Image Editing
  • Product Photography
  • Product Photography Tips
  • Real Estate Guide
  • Removing Wrinkles
  • Retouching Services
  • Shadow Making
  • Technology
  • Teeth Whitening
  • Tips
  • Tips to buy DSLR
  • Touch Ups
  • Touchups and Editing
  • Tutorials
  • Uncategorized
  • Using clipping path for e-commerce
  • Using Lightroom
  • Watermarking Image
  • Wedding Photo Editing

Tagg

A Comprehensive Guide to Product Photos for Ecommerce All That You Need To Know On Image Manipulation Amazing Product Photography Tips That'll Make You More Money Background Removal Services- A New Way To Enhance Imagery Background removal services- Your smart photo editor Background remove Benefits of Clipping Path Technique Best Clipping Path Service Company Best Clipping Path Service to Remove Background From Image Best photo editing software Bulk Professional Photo Editing & Retouching Services Clipping Path and Background Removal Services Clipping path for different e-commerce services Clipping Path Services for Multipurpose Business Cut Out Image Digital image manipulation Has Revolutionized ... DIY Lighting Setups for Shooting Reflective Products DIY Product Photography E-Commerce image editing E-Commerce Product Image Editing Services E-commerce Product Image Optimization Tips Ecommerce Product Photography Ecommerce Product Photography Guide Editing Techniques That Changed My Photography Expert Tips To Help Small Businesses Maximize Holiday Retail Sales Follow some tips when go for e-commerce product photography How do I make my photos look professional? How Image Clipping Services help in e-commerce? How to Add Shadows to Product Images to Increase Sales How To Choose the Best Clipping Path Service Image optimisation service for e-commerce Image optimization service for e-commerce Importance of image editing services Must-Follow Product Photography Tips Photoshop Image Masking Service - Advanced Image Background ... Product Photography Techniques Product Photography Tips Professional Photo Editing Tips & Tricks Quality Clipping Path & Background Removal Service Remove the Background of Your Product Photos Select the best E-commerce image editing services Step by step neck joint services Steps for Optimizing DIY Furniture Product Photography Techniques That are Essential For Successful Photo Manipulation What type of clipping path service is perfect for your business

Recent Posts

  • Tips For Capturing Great Digital Photos

    Perfect images and the perfection are no longer...
  • Planning A Photography Trip- Check Out These Tips

    A photography trip means the chance in the life...
  • Facts To Be Considered For Photographing Images

    Learning the art of photography is not the rock...
  • Help To Become A Better Photographer

    Photography is all about creativity and artistr...
  • Get Tips For Buying DSLR

    Mystifying with the number of cameras for havin...

Archives

  • September 2018
  • August 2018
  • July 2018
  • June 2018
  • May 2018
  • April 2018
  • March 2018
  • January 2018
  • December 2017
  • November 2017
  • October 2017
  • November 2016

Find Us On Facebook

OUR SERVICES

  • Clipping Path /Deep Etch
  • Image Masking Service
  • Photo Retouching Service
  • Shadow Adding Service
  • Photo Manipulation
  • Raster To Vector
  • Web-Shop Image Editing
  • E-Commerce Product Image Tips

USEFUL LINKS

  • Get A Quotation
  • Free Trial
  • FTP Request
  • Contact Us
  • Terms of Service
  • Privacy Policy
  • Blog & Stories
  • FAQs

GET IN TOUCH

Phone: +880 1725 414 131
info@clippingpathoffice.com

Clipping Path Office
House: 07 [B1], Road: 05, Sector # 10
Uttara Model Town
Dhaka 1230, Bangladesh.

  • AMEX

SAY HELLO!


© 2016. Clipping Path Office. All rights reserved.

Developed By: AR Creative Ltd.

TOP